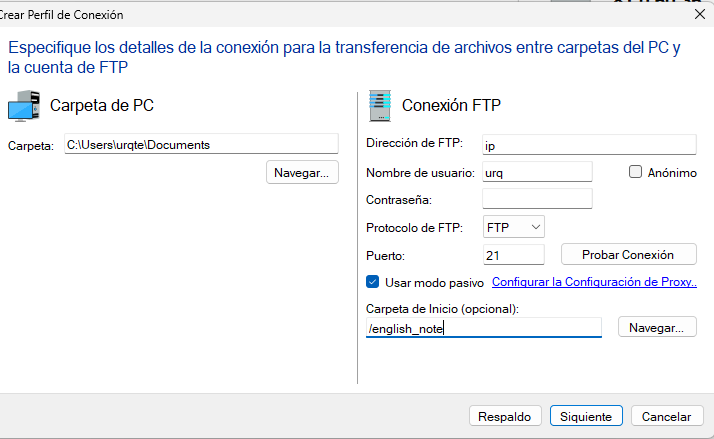
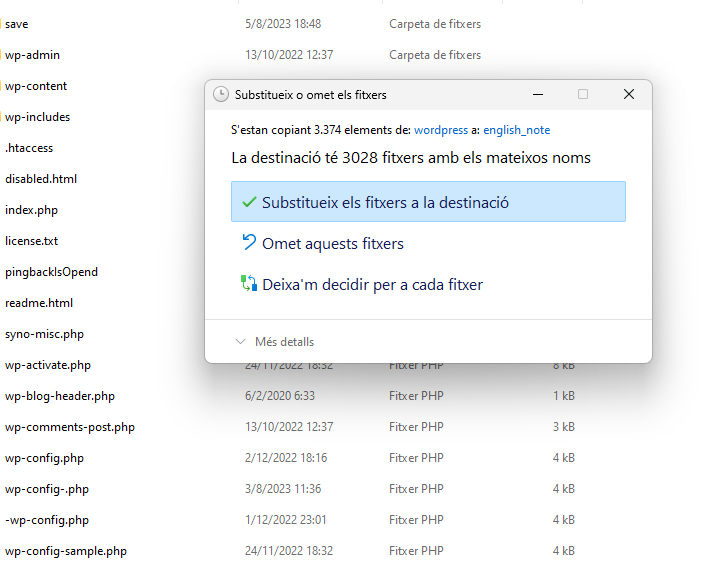
Canviar imatge destacada i paperera

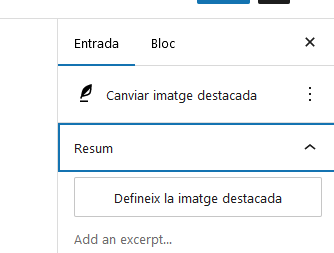
Quan entres a editar una entrada hauria de sortir aquestes opcions a la dreta de part de més amunt
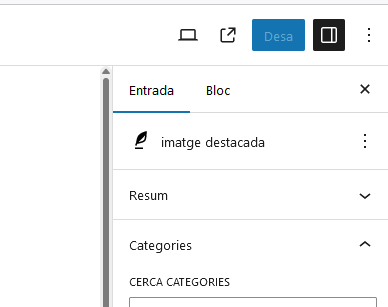
al obrir el resum
PAPERERA

fent clic a la paperera podem esborrar definitivament les entrades o recuperar-les

Moure el lloc de WordPress a un altre domini2

Home
About Us
Investment Philosophy
Contact Us

En aquesta guia, mostrem com moure manualment un lloc existent de WordPress a un nom de domini diferent.

Pas 1: verifiqueu que el lloc web actual funciona

Pas 2 – Descarregar els arxius de la web actual

Pas 3 – Exporta la base de dades

Pas 4: pengeu fitxers al vostre nou domini

Pas 5- Importa la teva base de dades

Pas 6 – Anar a wp_options

Pas 7: actualitzeu el lloc i la pàgina d’inici

Pas 8: actualitzeu els detalls de la connexió a wp-config

Pas 9: comproveu el vostre lloc al vostre domini nou

Pas 10 – Corregiu els enllaços permanents (opcional)

Pas 11 – Arreglar les imatges trencades (opcional)

Pas 12: torneu a comprovar el vostre lloc (opcional)


Anar a wp_options

localhost/run/mysqld/mysqld10.sock

localhost/run/mysqld/mysqld10.sock


<?php

/**

* The base configuration for WordPress

*

* The wp-config.php creation script uses this file during the installation.

* You don’t have to use the web site, you can copy this file to “wp-config.php”

* and fill in the values.

*

* This file contains the following configurations:

*

* * MySQL settings

* * Secret keys

* * Database table prefix

* * ABSPATH

*

* @link https://wordpress.org/support/article/editing-wp-config-php/

*

* @package WordPress

*/

// ** MySQL settings – You can get this info from your web host ** //

/** The name of the database for WordPress */

define( ‘DB_NAME’,’wordpress’);

/** MySQL database username */

define( ‘DB_USER’,’miquel’);

/** MySQL database password */

define( ‘DB_PASSWORD’,’Beseit1968!’);

/** MySQL hostname */

define( ‘DB_HOST’, ‘localhost’ );

/** Database charset to use in creating database tables. */

define( ‘DB_CHARSET’, ‘utf8’ );

/** The database collate type. Don’t change this if in doubt. */

define( ‘DB_COLLATE’, ” );

/**#@+

* Authentication unique keys and salts.

*

* Change these to different unique phrases! You can generate these using

* the {@link https://api.wordpress.org/secret-key/1.1/salt/ WordPress.org secret-key service}.

*

* You can change these at any point in time to invalidate all existing cookies.

* This will force all users to have to log in again.

*

* @since 2.6.0

*/

define(‘AUTH_KEY’,’PAQvBz7ywvby4rpvMjC4XEPu8ofyaU6ZCiBDQOdPhTfmcKmRFTXga4HInKN0tN+k’);

define(‘SECURE_AUTH_KEY’,’KUsPzRG3Df+MIauDrlLbMB6NIkqaSZ6jYtD5NcSp/zMnJR+KQIYL2wfC+R2BLfoT’);

define(‘LOGGED_IN_KEY’,’IPQN1P1C5zKZPh3/0uXpMCkv07q0diMR0vg8ugRkT9FJ7pMEfq/S5XdgXs9vd7Lb’);

define(‘NONCE_KEY’,’Enlrd7V0QvX6znEuAfmmAuk4eEuMqnkdBH0m3jn+ssAJ+6SgDoD8hCQDN1NOezjK’);

define(‘AUTH_SALT’,’VvLz5N8ap7gpcd7+O/uHZFp6J9EgiZ4lFbg7nU3EOaGfPXL0h+A1R9NXC81Atyu9′);

define(‘SECURE_AUTH_SALT’,’4041iN917fjmC3vjeLa60Nws8GLzmgCNqCTzNNo21eQuCnejGvcdgCHRQvvwMK97′);

define(‘LOGGED_IN_SALT’,’Wlekfl0ZXQGbBcltBXHcZmKsQZ0UdTVJfleLEuot78Xbi0nC3V4XGg9HdJbeuCig’);

define(‘NONCE_SALT’,’MSfwbkmEUzNmPLNHKKiDPLa+foQe4/uhoEvuWPo3YCweyubiPgDSzY8R53cUWmcV’);

/**#@-*/

/**

* WordPress database table prefix.

*

* You can have multiple installations in one database if you give each

* a unique prefix. Only numbers, letters, and underscores please!

*/

$table_prefix = ‘wp_’;

/**

* For developers: WordPress debugging mode.

*

* Change this to true to enable the display of notices during development.

* It is strongly recommended that plugin and theme developers use WP_DEBUG

* in their development environments.

*

* For information on other constants that can be used for debugging,

* visit the documentation.

*

* @link https://wordpress.org/support/article/debugging-in-wordpress/

*/

define( ‘WP_DEBUG’, false );

/* Add any custom values between this line and the “stop editing” line. */

/* That’s all, stop editing! Happy publishing. */

require_once __DIR__ . ‘/syno-wp-config-custom.php’;

Instal·lar múltiples blogs WordPress al synology NAS DS918+ (aprofitant la carpeta wordpress creada pel synology)

1 Instal·lar o reparar wordpress des del “package center” del synology (SENSE FER-LO CORRER) per a crear la carpeta wordpress amb aquests permisos
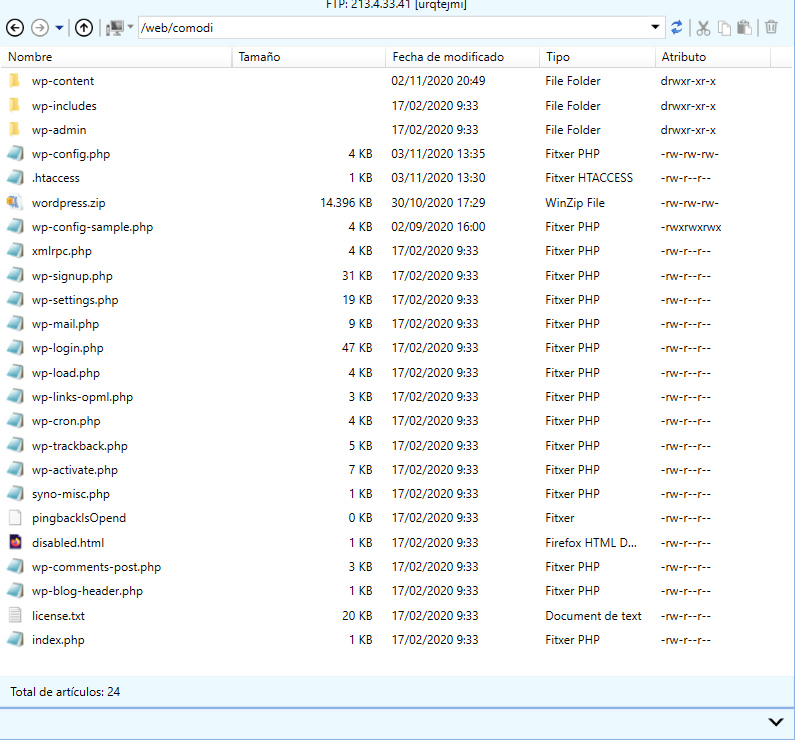
  •  canviar el nom de la carpeta “wordpress” per “comodi” o el nom de la carpeta
  • eliminar (cas d’existir) wp-config.php
  • copiar i pegar wp-config-sample.php. (cas de no existir)
  • borra les taules de la BD Comodi
  •  llançar el blog 213.4.33.41/comodi

Ja tenim instal·lat l’esquelet del blog. Comprovar :
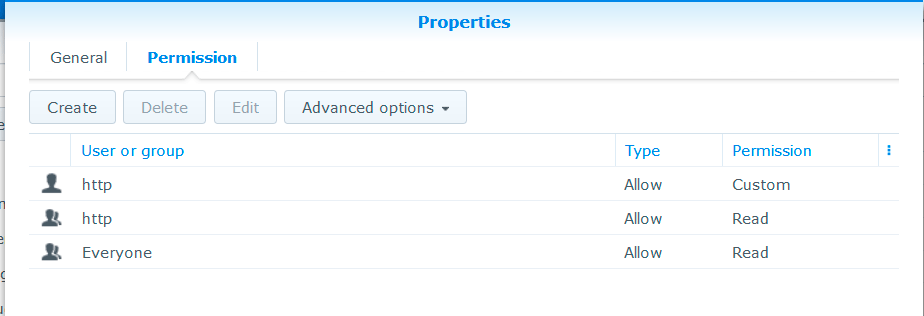
  • ..htaccess
  • s’ha creat un wp-config.php
  • Comprovar  que $table_prefix = ‘wp_’; sigui el correcte.
  • comprovar que funcionen les: actualitzacions sense FTP
  • la  carrega de fotos i mèdia funciona
  • pujar la carpeta “upload”
  • comprovar que els permisos siguin: owner: http permission:
  • pujar el tema que es vulgui usar al blog
  • pujar els plugins del blog
  • pujar la resta de fitxers i carpetes que no s’hagin creat ja
  • llançar el blog
  • comprovar si s’ha reparat i funciona

En aquest cas he actualitzat el blog english_note amb EXIT.

Com es pot veure a “Estat de salut del lloc” no ha quedat instal·lada la ultima versió de wordpress (actualment 5.5.3 en lloc de 5.35 que realment s’ha instal·lat) tots els intents que de moment he fet hem porten al error que només permet actualitzacions o baixa plugins via FTP.

POSO UN ENLLAÇ QUE EXPLICA COM FER-HO TOT I QUE A MI NO M’HA FUNCIONAT:

 
//**The next line allows direct downloads*/
define(‘FS_METHOD’, ‘direct’);

Aquesta línia al config.php soluciona el problema dels downloads.
SI TENS FITXER ON NO ES POT ESCRIURE HI HA QUE ASSEGURAR-SE QUE:

personalitzar el twenty-eleven

  • Carregar el tema twenty-eleven
  • crear el tema twenty-eleven-child
  • activar-lo
  • crear dintre de twenty-eleven-child el fitxer style.css amb la següent capçalera:
    /*
    Theme Name: Twenty Eleven Child
    Theme URI: http://localhost/beseit/wp-content/themes/twentysixteen-child/
    Description: Twenty eleven Child Theme
    Author: mut
    Template: twentyeleven
    */
    @import url(“../twentyeleven/style.css”);

tots els canvis de css que fen al fill s’aplicaran al blog sense modificar el style.css del pare. Al fitxer style.css del tema twenty-eleven-child queden recollits tots

ara farem un exemple de personalitzar una pàgina: La pàgina de cuina per exemple.

  • Es crea la pàgina nova cuina
  • S’obra page.php i es salva com page-cuina.php modificant prèviament la línia 3 anb: “Template Name: Plantilla_pag_cuina”
  • Editar cuina: seleccionar la plantilla de cuina
  • substituir la a la línia 15 get_header() per get_header(cuina);
  • crear header(cuina). Igual que com ho hem fet amb les entrades. sobre header i es salva com header-cuina

Alternativa 2:

  • Es crea la pàgina nova inici (beseit)
  • S’obra sidebar-page.php (plantilla de la barra lateral) plantilla i es salva com page-beseit-lateral.php modificant prèviament la línia 3 anb: “Template Name: Plantilla_pag_beseit-lateral” i eliminant el sidebar
  • Editar inici: seleccionar la plantilla nova
  • la imatge de capçalera es selecciona simplement triant una “imatge destacada”

Pagina Diaris:

Vaig a documentar la pàgina DIARIS ja que incorpora interessants característiques:

Movent WordPress: de servidor, canviant el nom de la carpeta …

MOVENT DE SERVIDOR PERÒ MANTENINT NOMS DE CARPETES

UPDATE wp_1options SET option_value = replace(option_value, ‘http://192.168.1.40/beseit’ , ‘http://www.beseit.net’) WHERE option_name = ‘home’ OR option_name = ‘siteurl’

UPDATE wp_1posts SET guid = replace(guid, ‘http://192.168.1.40/beseit’ , ‘http://www.beseit.net’)

UPDATE wp_1posts SET post_content = replace(post_content, ‘http://192.168.1.40/beseit’ , ‘http://www.beseit.net’)

UPDATE wp_1postmeta SET meta_value = replace(meta_value, ‘http://192.168.1.40/beseit’ , ‘http://www.beseit.net’)
————— —————–
UPDATE wp_1options SET option_value = replace(option_value, ‘http://www.beseit.net’ , ‘http://192.168.1.40/beseit’) WHERE option_name = ‘home’ OR option_name = ‘siteurl’

UPDATE wp_1posts SET guid = replace(guid, ‘http://www.beseit.net’ , ‘http://192.168.1.40/beseit’)

UPDATE wp_1posts SET post_content = replace(post_content, ‘http://www.beseit.net’ , ‘http://192.168.1.40/beseit’)

UPDATE wp_1postmeta SET meta_value = replace(meta_value, ‘http://www.beseit.net’, ‘http://192.168.1.40/beseit’)
————— —————–

UPDATE wp_1options SET option_value = replace(option_value, ‘http://www.beseit.net’, ‘http://192.168.1.40/beseit’) WHERE option_name = ‘home’ OR option_name = ‘siteurl’;

UPDATE wp_1posts SET guid = replace(guid, ‘http://www.beseit.net’, ‘http://192.168.1.40/beseit’);

UPDATE wp_1posts SET post_content = replace(post_content, ‘http://www.beseit.net’, ‘http://192.168.1.40/beseit’);

UPDATE wp_1postmeta SET meta_value = replace(meta_value, ‘http://www.beseit.net’, ‘http://192.168.1.40/beseit’);

————— —————–
urquizu local-> justhost
UPDATE wp_1options SET option_value = replace(option_value, ‘http://192.168.1.40/urquizu’, ‘http://www.urquizu.info’) WHERE option_name = ‘home’ OR option_name = ‘siteurl’;# MySQL ha retornat un conjunt buit (p.e. cap fila).

UPDATE wp_1posts SET guid = replace(guid, ‘http://192.168.1.40/urquizu’, ‘http://www.urquizu.info’);# 47 files afectades.

UPDATE wp_1posts SET post_content = replace(post_content, ‘http://192.168.1.40/urquizu’, ‘http://www.urquizu.info’);# MySQL ha retornat un conjunt buit (p.e. cap fila).

UPDATE wp_1postmeta SET meta_value = replace(meta_value, ‘http://192.168.1.40/urquizu’, ‘http://www.urquizu.info’);# MySQL ha retornat un conjunt buit (p.e. cap fila).

Moving Directories On Your Existing Server

He tingut necessitat de canviar el nom de la carpeta que contenia la web http://192.168.1.40/english —-> http://192.168.1.40/english_note/

Aquest canvi és més complexe del que sembla a primera vista. Ja que per exemple hi ha post que apunten a english/upload …

He partit del supòsit que si a la bd MySQL canvio tots els registres que contenen english a english_note, la cosa hauria de funcionar. He fet la prova i sembla que ha funcionat. Si surt algun inconvenient ja ho anotaré. De moment va bé.

Les taules que contenen /english/ són :

  • wp_comments -> 1 reg
  • wp_options -> 4 reg
  • wp_postmeta (tots al meta_value) ->290
  • wp_post (camps: postcontent , guid) 2967)

Les sentències SQL serien:
UPDATE `wp_postmeta` SET `meta_value` = REPLACE(`meta_value`, ‘%/english/%’, ‘%/english_note/%’) WHERE `meta_value` LIKE ‘%%/english/%%’ COLLATE utf8mb4_bin
UPDATE `wp_posts` SET `post_content` = REPLACE(`post_content`, ‘/english/’, ‘/english_note/’) WHERE `post_content` LIKE ‘%/english/%’ COLLATE utf8mb4_bin
UPDATE `wp_posts` SET `guid` = REPLACE(`guid`, ‘/english/’, ‘/english_note/’) WHERE `guid` LIKE ‘%/english/%’ COLLATE utf8mb4_bin

ho he fet en l’administrador MySQL.

PER SEGURETAT HI HA QUE FER UN BACKUP DE LA BD PRÈVIAMENT I FER-HO EN LOCAL
————— —————–

COM ES POT SABER QUINES CON LES TAULES QUE CONTENEN /ENGLIS/?

BD/CERCA/selecciona tot/executa

cerca

Publicar una entrada de vídeo


** Mirar anotació al final

En primer lloc s’ha d’instal·lar  un plugin adequat. Després de provar-ne varis he instal·lat:

  • wp-video-posts
  • Stream Video Player

Els dos plugins  són necessaris perquè tot funcioni correctament. Tot i això, el plugin,  dona aquest avis: “The only extensions available for the upload will be mp4 and flv.”
Amb el format mp4 no funcionava la part de vídeo , si la de so. En canvi en format flv funciona tan el vídeo com el so.
Per tant el primer que s’ha de fer quan es disposa d’un vídeo es passar-lo a aquest format, això es pot fer en el plagin:

  • Media converter

Per fer aquestes conversions n’hi ha infinitat de plugins, aquest funciona i es molt senzill.
Per a gravar el vídeo que es vol pujar, lògicament es te que fer en una càmera de gravació o capturant pantalles del ordenador, que es el que es mostra al exemple de baix.
Per a capturar aquest vídeo del ordenador he utilitzat el programa:

  • EZ recorder es també molt senzill. Genera vídeo en format. AVI. Que com ja s’ha explicat abans s’ha de transformar a .flv mitjançant “media converter”. Aquest programam té una serie de limitacions. Una d’elles es que admet un temps de gravació limitat (uns 10 miniuts)

[stream provider=video flv=x:/www.uoc.beseit.net/wp-content/uploads/2013/a1/suf3-u1.flv img=x:/www.uoc.beseit.net/wp-content/uploads/2013/a1/suf3-u1.flv embed=true share=false width=640 height=300 dock=true controlbar=over bandwidth=med autostart=false responsive=16:9 /]

*********************************

[stream provider=video flv=x:/www.beseit.net/wp-content/uploads/2013/videos/monica_oltrra.flv img=x:/www.uoc.beseit.net/wp-content/uploads/2013/a1/suf3-u1.flv embed=true share=false width=640 height=300 dock=true controlbar=over bandwidth=med autostart=false responsive=16:9 /]

Nota 22-10-2017. Amb la versió 4.3.1 de worpress si es puja el video en format .ftv a la mediateca, no fa falta fer res, només insertar-lo al post.

Les eines que utilitzo ara son :  screen recorder de ZD soft, mkv video converter.(que si la grabació es far en flv no cal)

Insnstal·lació d’una icona (favicon) a WordPress

Es molt útil tindre que un lloc web o bloc wordpress tingui definida una icona que la mostri el navegador quan s’accedeix a aquest lloc. Això es especialment útil si utilitzen pestanyes fixes a la barra del navegador.

1. WordPress:

per afeguir un favicon a wordpress : “Apariencia” -> “Presonalizar” -> “Entidad del sitio“.

——- precediment antic ——————–

  • Amb un client de FTP, carregar el nou favicon.ico arxiu a la carpeta principal del tema actual.
  • Pujar un altra còpia del arxiu favicon.ico al directori principal del seu lloc (és a dir, http://www.beseit.net/faviicon.ico ). Això mostrarà el favicon en els teus subscriptors feedreaders .

Tot hi això en Internet explore hi ha que editar header,php  i afegir just després de <head>

<head>
<!—————————— –>
<link rel=”shortcut icon” href=”<?php bloginfo(‘stylesheet_directory’); ?>/favicon.ico” />
<!—————————— –>

—————————————————-

2. Pagina web

  • Afegir el fitxer \www\beseit\polidiccionarifavicon.ico just a la rel de la pàgina web
  • afegir  just sota <head>
    <link rel=”shortcut icon” href=”images/favicon.ico” />