revisar Backup del Synology valldoreix

El Backup del servidor Synology DS214se es fa mitjançant el programa Hiper Backup y Sharet Folder Sync
Amb Hiper Backup es fa un backup de les bases de dades MariaDB y la aplicació web Station
Amb Shared folder Sync es repliquen les carpetes music, photo, software, video, web al servidor beseit.synology.me

Shared Folder Sync

The Shared Folder Sync service allows users to sync shared folders from one Synology NAS device (the source) to other Synology NAS devices (the destination) in LAN or over the Internet.

Shared Folder Sync will perform a full sync of the selected shared folder(s) for the first time. Afterwards, only changed files will be synced. Files that have been removed from the source will also be removed from the destination.

Note:

  • Shared Folder Sync is a one-way sync solution, syncing the files at the source to the destination. For a 2-way sync solution, please use Cloud Station ShareSync.
  • If on the destination exists a shared folder that has the same name (e.g. SharedFolder) with the source shared folder, the destination folder will be named “SharedFolder_1”.
  • If on the destination exists no shared folder that has the same name with the source shared folder, a folder will be created using the name in the corresponding or the first volume available.
  • By default, no user will have privileges to access the shared folder on the destination. Please contact the destination admin for privileges.

Enabling the Service

To enable Shared Folder Sync:

You have to enable the service on the destination Synology NAS first.

  1. Go to Control Panel > File Service > rsync
  2. Select Enable rsync service to enable the Shared Folder Sync service.
  3. Click Apply.

llegir més

Aplicacions que tinc instal·lades a synology_vall

Web Station
mariaDB
activar “enable email notifications”  control panel/ notifications ->permet recuperar password de wordpress
Perl
PHP
photo station. per pujar fotos del mòbil al servidor:
1 seleccionar la foto al mòbil
2 seleccionar l’acció de pujat î a DS photo
3 a la aplicació DS del móbil seleccionar chose”/photo”
4 premer -> per pujar la photo (star uploading)

audio station (enllaç per a descarregar plugin de lyrics -> fujirou_musix_match-1.2.aum , fujirou_lyric_wiki-1.5.aum

CLOUD SYNC permet sincronitzar dropbox, one drive, google drive
video station
per a poder accedir-hi per internet:
1. go to control panel

2. choose router configuration

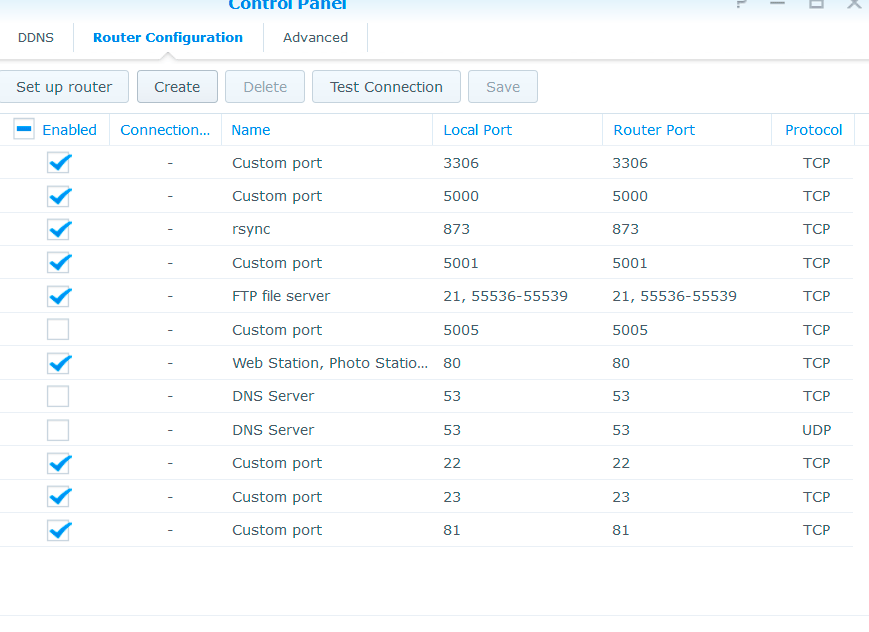
3. make sure service “video station” is enabled and assigned ports are 9025-9040.
most likely when you run “check connection” it will give you a message not tested and this isi all right.

4. go back to control panel and choose Application Portal

5. once its opened double click on edit port / alias rules

6. place a check mark “Enable customized alias” where Alis field says : “video”. this will give you an access to vide station by simply typing in the new browser window the following:
http://you_ip_address:5000/video

7. activate redirect from in order to avoid typing http://you_ip_address:5000/video but tryping

http://you_ip_address/video (without port number)

8. click ok all the back and dont forget to save changes.

9. this will give you access to vedeo station and others as well.

Apps que tinc instal·lades al meu android

Teclado Multiling:

Aquesta aplicació és molt útil quant tens necessitat d’escriure notes en diversos idiomes. La trobes al play store amb “teclado multiling”

un cop instal·lada anar a ajustes/idioma e introduccion/teclado multiling/setings/ idiomes

cal descarregar els diferents diccionaris:

MK.Catalan: http://multiling-kbd.appspot.com/d/cat.html -> instal·lar diccionaris i pegar l’adreça al buscador-> utilitzar play store

Amb una mica de paciència tens tots els diccionaris que necessites. al trepitjar la barra  espaiadora pots triat el diccionari.

WhatsApp

QR Code Reader ->Permet posar el WhatsApp al PC

CamSam-> detector de radars

Synology VIRTUAL HOST

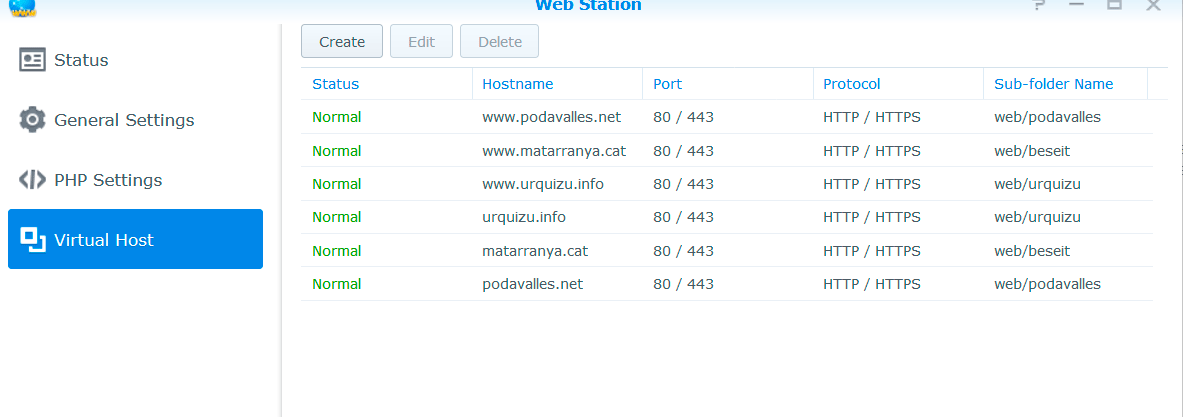
Una característica molt interessant del servidor Synology es que permet tenir diversos dominis apuntant a carpetes diferents. Es adir amb un única IP fixa es possible tenir fins a 8 domis matarranya.cat, beseit.net, cadascú d’ells a la seva carpeta corresponent. (add on domini)

WWW (WEB STATION) /VIRTUAL HOST
A l’imatge de sota es mostra com s’ha de configurar. Després d’una actualització m’ha deixat de funcionar i s’ha solucionat activant i desactivant HTTP back end server nging apache


xxxxxxxxxxxxxxxxxxxxxxxxxxxxxxxxx

Accioxns a Moniker:x

com ferm servir com a servidor de pagines web el nostre synology amb la seva Ip, hem tenir seleccionat defauld nameser i posar la seva ip corresponent (si fos epage etc. tindríem external nameserver) IMPORTANT CREAR SUBDOMINI WWW.URQUIZU.INFO i verificar que la feina s’ha fet

With the feature of Virtual Host, you can setup multiple web sites on Synology NAS. A domain name is required for Virtual Host set up. There are two different settings for each Virtual Host set up: Name-based and Port-based. Each Virtual Host web site requires a Document Root directory for file storing and accessing.
Add a new Virtual Host

Click Create
Select the type of Virtual Host: Name-based or Port-based.
Enter the hostname and select the protocol and port number is necessary.
Select the Document Root path, this folder will be used to file store. (Please refer to Note)
Select whether or not to enable HSTS setting (forces browser to use HTTPS connection) and HTTP/2 to speed up the web transfer.
Select the back-end server for this Virtual Host.
Enable PHP back-end is necessary and choose the back-end type.
Click OK to create the Virtual Host.
When SSL encryption connect is enabled, you will be promoted and redirected to the Certificate page for further setup.

Note:

For better flexibility and security, Web Station uses the http user group to execute tasks. Therefore, to control access permissions for your web pages, please change the http group’s access permissions for each corresponding folder and file. For example, if you want to make the vhost1 folder accessiable via Web Station, you’ll need to make sure the http group has proper read/write permissions for the vhost1 and files/folders in it.

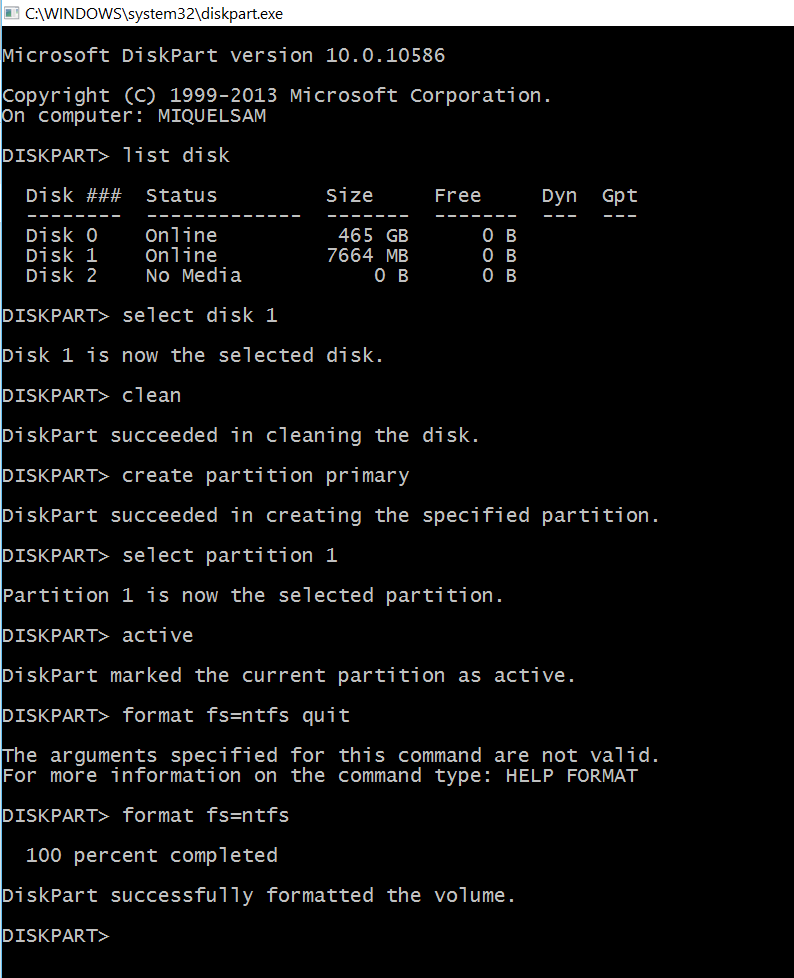
Format and Clone a USB Flash Drive (The best Acronis True Image)

usb_particio
If you have DOS or a Command Prompt window you can use Xcopy to move your files and clone a USB flash drive. To do this, you will need to know the drive letters of both of your USB flash drives. In this example, if your old USB drive is drive “H” and your new drive is drive “G”, you would type the following in the command prompt window: xcopy H:\*.* G: /e /h /k and then press .

L’únic que m’ha funcionat ha sigut el programa CRONIS TRUE IMAGE.

MediaMonkey

MediaMonkey és el reproductor de àudio i vídeo que últimament m’he instal·lat. vaig començar en musicmatch jukebox fa més de vint anys. Per a mi va ser un pioner en la reproducció de mp3 molt abans que spoty i altres mitjans que avui en dia existeixen. Després durant molt de temps vaig fer servir MediaJukebos-xx en les seves diferents versions. La veritat es que en el reproductor multimèdia de Windows   mai m’hi he pogut familiaritzar.

Característiques bàsiques de MediaMonkey

Manage 100,000+ music and video files without bogging down.
Record CDs and download music, movies, and podcasts.
Automatically lookup and intuitively tag album art, lyrics and other metadata.
Manage any audio / video genres: Rock, Classical, Audiobooks, Podcasts, Home movies, tv, etc.
Wi-Fi Sync with MediaMonkey for Android.

Play MP3s and other audio formats, and never again worry about varying volume.
Create playlists and let Auto-DJ & Party Mode take care of your party.
Sync Android, iPhone, iPod, iPad & others, converting & leveling tracks on-the-fly.
Share via DLNA and convert MP3s, M4A, OGG, FLAC, WMA, MP4, AVI, and WMV to support most devices.

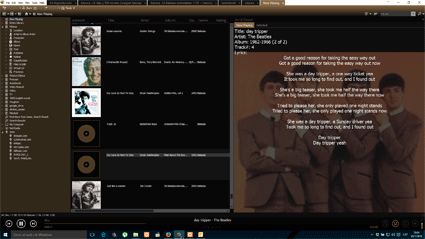
mediamonkey1

  • Fent clic a la caràtula es es passa de mode imatge a mode ‘lirycs’
  • Fent clic amb el botó dret es pot afegit la lletra o editarla
  • You can change font size at Tools | Options | Skin
  • També choose fields text size-> 22 px


synology com a servidor de nom de domini privat

Abans de començar

Abans de configurar DNS Server, consulteu els requisits següents:

1 Instal·lar DNS Server: per instal·lar i executar el paquet DNS Server de Synology, entreu en DSM i visiteu el Centre de paquets.

2 Obtenir una adreça IP pública i fixa: per configurar un servei DNS públic, ha d’adquirir una adreça IP fixa per a la seva Synology NAS. (213.4.33.41).

3 Registrar un nom de domini: moniker->  beseit.net. Quan el registrador li notifiqui que el seu nom de domini s’ha registrat correctament, pot crear una zona màster per al domini en Synology DNS Server.

4 Comprovar la configuració del tallafocs o del reenviament de port: els serveis DNS requereixen l’ús del port 53 de TCP i UDP. Si el Synology NAS utilitza un tallafocs, s’ha d’obrir aquest port. Si el servidor NAS es connecta a Internet a través d’un encaminador, configureu regles de reenviament de port i obriu el port TCP i UDP 53. (alejandra 192.168.1.1 ; 1234, beseit00)
Registrar el seu dispositiu: no ha d’oblidar registrar l’adreça IP i altra informació necessària de la seva Synology NAS en el proveïdor del seu nom de domini. Altrament, els clients no podran consultar el seu Synology NAS a través d’Internet. Consulti al seu proveïdor de noms de domini per a més informació. En funció de la configuració per als servidors de noms de domini per al proveïdor, els canvis en servidors de resolució DNS poden aplicar-se en un termini de 48 hores o més.

5 Canviar la configuració de l’encaminador: si va a configurar el seu servidor DNS per a la seva xarxa local, de modificar la configuració del servidor DNS en el seu encaminador o el seu dispositiu client de manera que el servidor DNS pugui ser consultat. Per a més informació, consulteu el manual de la encaminador o el dispositiu client.
Traductor de Google per a empreses:Translator ToolkitTraductor de llocs webGlobal Market Finder

dbForge Studio for MySql (professional edition 6.3.358)-

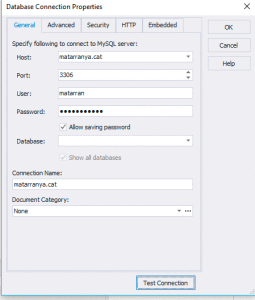
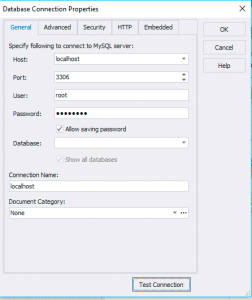
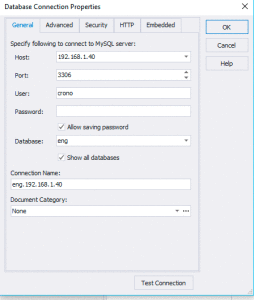
Les bd MySql les gestiono amb dbForge Studio for MySql (professional edition 6.3.358). També he instalat EMD MySQL manger. Les connexions són:

a ) conexió matarranya.cat


matarranya_cat

b) localhost

localDesprés d’actualitzar el paquet appserv 32-2.5.10 -> appserv 32-8.1.0 dbForge Studio for MySql no podia obrir les BD existens en local. sortia l’error: ADV ERTÈNCIA: ‘INFORMATION_SCHEMA.SESSION_VARIABLES’ feature is disabled; see the documentation for ‘show_compatibility_56’

això es soluciona executam aquesta instrucció de SQL des del phpMyAdmin:

set @@global.show_compatibility_56=ON;

c ) beseit.synology.me

beseit.synology.me

d ) synology_valldoreix

synology_valldoreix

NAS Synology model:DS214se

Des que he instal·lat aquest disc dur de xarxa estic molt més tranquil pel que fa a la seguretat de les dades dels meus ordinadors. Però apart d’aquesta important funció en fa moltes altres. Avui descriuré el passos a fer per allotjar una pàgina web o blog wordpress, per exemple, accessibles per internet:

 External accessexternal access
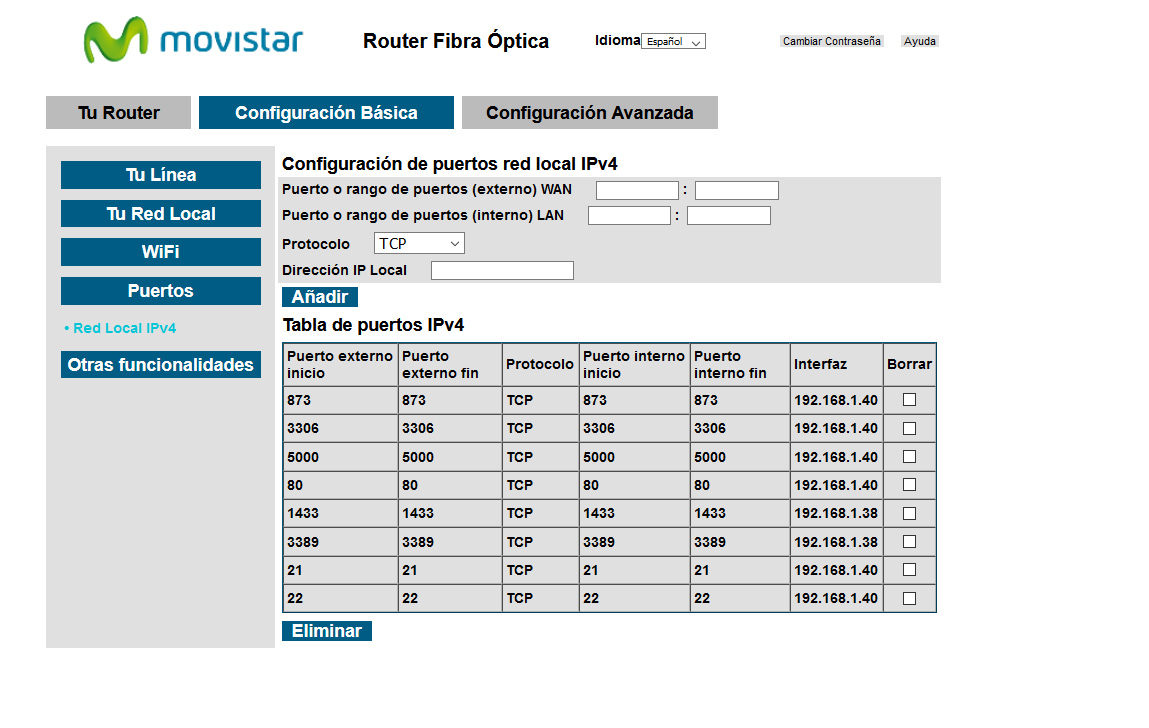
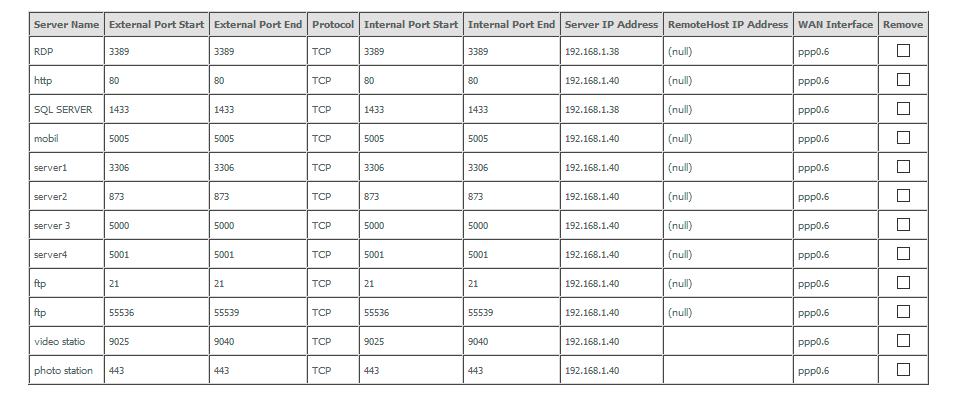
2 IMPORTANT!: obrir els ports del router. En aquest cas el port 81 ha fallat perquè el té reservat Netports (a Beseit)
Shot003Network/network interface

Shot007Shot008Shot0093 Hem de configurar el servei de WEB

Shot010Un cop hem activat aquesta pestanya hem de veure això:

Shot012

Sempre és possible tornar el servidor als paràmetres de fàbrica:
synology_inici